Wednesday, September 29, 2010

Felt Popcorn Tutorial

Awhile back I posted this picture of the felt popcorn I had made and promised to post a tutorial.


So here it is, I guess. 

I've never done a tutorial so forgive me if it makes no sense. :0)

I am making a bunch of felt food for my neice for Christmas. I thought it would be great for her to play with in the little kitchen she got last year. I looked all over the internet and couldn't find a popcorn pattern that was quite what I wanted. So, of course, that left me with having to come up with something on my own.

I started with just a circle of white felt (actually I tried several different sized circles) but still didn't like the finished product when I got them all sewn up. I spent so much time cutting it into the shape I wanted (after I'd sewn my circle) that I decided I needed to start with a different shape altogether.

I cut several shapes out of paper and tried them and finally settled on this flower looking piece. To make it a little more sturdy, I cut it out of heavy plastic (it's the top off of a small plastic container that had scrapbooking ribbon in it--I like to use what I already have around the house if I can.)


Then, I used a yellow colored pencil to trace my pattern onto the white felt. I figured since I would be 'buttering' the popcorn later, yellow was my best bet.


 Then cut them out.


Using white thread I stitched one long stitch in each petal.


I rolled up a tiny ball of stuffing.


And placed that in the center of my piece of popcorn.


Then pull the thread tight so that it gathers up all of the petals.


You can adjust them around if you need to.

Then I wrapped the thread around the outside of my piece of popcorn while pulling it even tighter.  I wanted to make sure that the stuffing would stay put inside. The thread should wrap around above the stuffing but still at the base of the petals.


Next, I ran the needle up and through the center of my piece of popcorn so that I could knot it on the inside. That way the knot could be hidden.


After the piece of popcorn is all sewn, I hit the edges with a yellow marker. There is no right or wrong way to do this. I just wanted a little yellow here and there so that it would look buttered. I still wanted it to be mostly white. Be sure, though, that the marker is a non-toxic one. Don't want anyone getting sick if the popcorn makes to their mouth. Although, these pieces are really popcorn size so it would be wise to keep them away from little ones that don't know yet not to put things in their mouth.


And that's it! I love the way it turned out. It looks really authentic and you don't have to guess what it is. lol

One word of caution though........since this is working with white felt, wash your hands before you start working on these. Otherwise, your popcorn will be dingy and nobody likes dirty popcorn.

I'm linking up with Tea Rose Home's Wednesday linky party. Be sure to check out all the wonderful things you can find there.


Tuesday, September 21, 2010

Baking fail

Usually, I make bread for my kids' lunches (and to eat in general). They go through a loaf bought at the store much too quickly so I try to save a little $$ by making it myself.

I love  Craft Gossip and saw this post and decided to try making the panda bread myself. She used cocoa to color her bread but I didn't want the flavor so I just kneaded in some gel black food coloring. That part worked out fine. My fail was the overall outcome.


See?

He's only a panda if he's really messed up.

Poor little thing. lol

Sunday, September 19, 2010

And yet another shirt...........

I bought this shirt to go with something else, but it didn't work for that. I found another one that I liked better.


I found some bling (I don't know what else to call them because they're not really beads) on clearance at HL which I bought in several colors.

(I bought them just becaue they were on clearance and I was sure I could do something with them....we've all been there haven't we?)

Anyway, it took a few days for me to put the two purchases together in my head with an idea.

I used a fabric pen to mark my placement points. Then I hand stitched them into place.


I've already worn the finished product and I loved just the touch of flash that it gave to the shirt without being over powering.

Friday, September 17, 2010

Back to shirt refashioning

Ha! I guess I can't go too long without showing a shirt make-over.


I wonder if there is a twelve step program for this? lol


Anyway,


I had these two shirts that I didn't wear much. One was too short and one was too low cut.

(Pardon my helper in the picture. She doesn't quite understand 'move' when I say it.)

I've been seeing all these posts from other bloggers that put ruffles onto shirts to re-do their look. I'm not usually much for ruffles so when I tried it I didn't make them terribly full.


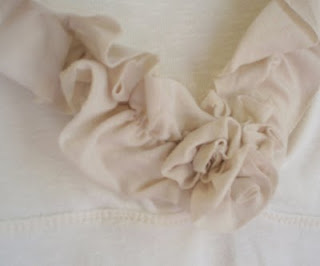
I gave it my best shot at making some little gathered roses at the bottom of the neckline to help make it even a little less revealing.


I still need to work on that technique a little, but at least I have a shirt I'll wear now.

And what's even better is that I only used the sleeves off of the shirt that was too short. That still leaves me with options on doing something else with it. woohoo!

Thursday, September 16, 2010

Today's the Day!!!

Believe it or not, the count down has started.


Today is 100 days til Christmas!


Hard to believe isn't it?


Visit 100 Days to Christmas to sign up for lots of help and support to get you through the holidays without losing your sanity.

Wednesday, September 15, 2010

Another block finished

I finished my second block for my Annie BOM over at Daisy Cottage Quilting.


I'm really loving these!!

Be sure to go check out Daisy Cottage Quilting. Sharon is killing me with all the cute things she has. I've just recently ordered a quilt kit from her too.

Now I just need to figure out when I'll have the time to get it all worked on. My list is growing much more quickly than I'm getting items checked off. But then, I'm certain I'm not the only crafter out there with this problme.

Tuesday, September 7, 2010

Not a refashion!

I know that I've mostly had shirts that I've refashioned lately, so I thought I would prove that I really can do something different. lol


I made these muffins the other morning.


They're donut muffins.


How can you go wrong with muffins that use donut dough?


The kids loved them.


I got the recipe at the Hillbilly Housewife site. She's got some really great recipes there. You should go check it out.


It's raining here today. I should be at home, snuggled on the couch, working on something fun. I say snuggled because I'm always cold when it's raining. It really doesn't matter that it's probably in the 80's outside, I'm still cold. I wore jeans today with a 3/4 sleeve length sweater. That makes me a little closer to crazy doesn't it?

Wednesday, September 1, 2010

It's a refashion, but not mine this time.....

Abigail has been bugging me to get her a sewing machine. (Really that's just one of the things she's been bugging me about.)


Anyway, I told her that first she should learn to sew by hand because there are some things that can't be done on a sewing machine. And, if she learns the mechanics of how things work and/or go together it will only help when she is creating things on the sewing machine.


She has a bag of clothes in her room that she doesn't wear anymore so I told her to use those things to work with on creating something new.


Here's what she came up with.


The red was a shirt that she cut up and turned into a jacket. She took the bottom of the red shirt and used  to make the flowers and used the buttons from the red shirt for the center of the flowers.


She did a great job, didn't she?


I'm linking this bit of bragging to Tea Rose Home's Wednesday link party. Go check out all the other great things she and so many others have to share!