Thursday, December 19, 2013

You can never have too many purses....

Or maybe I should say that I wouldn't ever admit to having too many purses.

And to go with that kind of thinking, I made this cute little bag for myself.


The pattern is really easy and it only took a couple of hours, start to finish, to get the purse made. I did make one change to the pattern though. I have a concealed carry license and often carry a firearm with me, so I really like to have a place to put it. Ha! Anyway, I added two large pockets to the inside of the purse. They start from a couple of inches below the top of the purse and extend all the way to the bottom. Because I put them in the middle, it actually separates the inside of the purse into two sections. It wasn't part of the original pattern, but it was a really easy little tweak.

I took the purse with me while we were in Las Vegas and actually had someone (a woman in an accounting class with me) ask me about it and express interest in maybe purchasing one. That's always the best compliment, isn't it?

I got the pattern from a link that my daughter sent me via Pinterest, but now I can't find it for the life of me. It's not in my Pinterest 'likes' or on any of my boards. I even did a search of where I thought it linked back to and still can't find it. How crazy is that?! I printed out the instructions, so I'll dig those up and post the link here as an update.

Monday, November 25, 2013

Make it a pocket tee.....

My children's birthday was last week. One of them is a huge Hunter Hayes fan and for her birthday she had asked for tickets to his concert in Dallas, so that's what she got.  Well, in keeping with that theme, I decided to make a customized shirt for her. I settled on a pocket tee with a custom pocket.

I chose a picture of her with Hunter Hayes from a concert that she had been to earlier in the year where she also purchased the 'coffee house experience' so that she could meet him.

I ironed freezer paper to a piece of off white fabric and then cut the fabric to match the size of the paper. (Be sure to iron it with the wax side to your fabric.) Then, I just ran that through our ink jet printer.


(I messed it up on the first go round--I put it in with a seamed side starting off which was too thick--so I got a little extra ink on the other end.)

After I printed my picture on there it occurred to me that I might should have done something special to the fabric. I got online and found some information saying that I should have treated the fabric with something before printing and then follow that up with a separate treatment after printing or the whole thing would wash off with water. I was in a panic!!! Then, I remembered that I had a Tide To Go pen in my desk drawer (I printed it at the office) so I tried that. First I tried to rub off the part where I had messed up and nothing happened. Then I tried a corner of the picture and, as you can see, it didn't even smear. What a relief!!

So I cut out my pocket leaving plenty of room around the edge of my picture.


Then, I hemmed it across the top of the pocket, folded the edges under, and attached it to the t-shirt.


So there you have it! It was quick and easy.

But best of all.........she loved it!!!

Friday, October 4, 2013

Halloween Quicky

This was so quick and easy for a cure Halloween decoration.


I just put a smaller jar inside of this large one to hold the flowers. Then you just layer your candies into the space between the two jars. Add flowers to the inner jar and you're done.

It's just that quick and that easy. And it's adorable to boot. What more can you ask for?

Tuesday, September 17, 2013

Made over Tee

I can't believe that once again it has been forever since I posted!! School for the kids has already been a little crazy. We're all still getting used to the fact that they are now in high school. Them because they have a whole new set of responsibilities and expectations. And me because, well....my babies are freaking in high school! How does that happen so fast?!

So far in the three weeks since school has started there have been three colds, two cases of chiggers,  and one sports injury. Hoping that the next three weeks are better!

Anyway, all of that to say that I'm staying busy, but having a hard time finding the time to blog. I have had a few orders to ship out so that's been a good thing.

I also made myself a new shirt. I started with a teal colored t-shirt. I cut out the neckline and cut the sleeves to be more flattering. Then I drew a flower near the neckline with chalk. I pinned a grey piece of jersey knit (I cut it off of a t-shirt that was destined for the rag pile) and stitched over my chalk lines by hand using a big straight stitch. Then I went back and cut away the top layer of fabric to form my petals.


I really like the way it turned out. I'll have to come up with some more designs and make others.

Friday, August 30, 2013

Back to school....

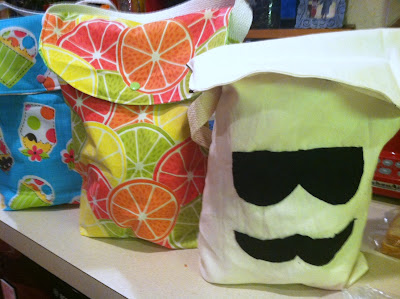
My children started school on Monday. So, on Sunday night I was busy getting lunch bags made because I had put it off all summer. I only made them for the girls. Wyatt wouldn't dare carry a lunch bag made by his mother. lol


In my haste I managed to get the handles twisted on two of them so I guess I'll have to go back and get those fixed. But, the girls are happy with them so I that makes me happy too.

I don't have a pattern for these, I just kind of wing it as I go. Maybe I'll put together a tutorial for it.....

Monday, August 19, 2013

Been Busy

Even though I haven't been posting much lately, I've still been busy. Had a few orders to get out and a few more still to get done.


I'm loving it, though!!

Tuesday, August 6, 2013

A Quicky

Finished a quick little project over the weekend.


I fed beads onto memory wire. It's curled in on itself at both ends. At one end I made a bigger loop so that I could add these cross charms.

That's it. Quick, easy, and cute. Now I like that!!

Wednesday, July 24, 2013

I took my husband's shirt

I did! I took it right out of his side of the closet and cut it up to make a shirt for me. When he saw what I was doing he was like, "Hey! Isn't that my shirt?" And I said, "Yes, it sure is!" And I don't even feel bad about it. Because, the truth is, he has never worn it and it's been hanging there for at least 3 years. So I decided to put it to good use and make something for myself.


I saw this shirt on Pinterest and I went and checked out the pattern and tutorial at Craft Habit.

Isn't it cute?

But, I wasn't starting with just fabric so I kind of had to just wing it......so mine doesn't really look like that either.

I started with this shirt, which I shopped from my closet (on my husband's side).


See, if you look on the edge of the table by the sleeve, you can see the price tag still attached. Three plus years is long enough to wait to see if he'll wear it!!

Anyway, I cut off the pocket and the buttons. Then I cut off the area where the buttons were, the area with the buttonholes, and the collar. I cut all of that off in one long strip. But I kept it around just in case.....and it's a good thing I did.

Here's the shirt after I cut that part off.


Then I tried it on and marked where I wanted the neckline to come to. I cut off the excess so that it was v-shaped then seamed it together all the way down the front.

Because I'm kind of a lazy crafter I decided to use the strip that I cut off the front of the shirt where the buttons had been as my facing along the neckline. It had been folded over and stitched so it would give me a finished edge on the inside too, so why not? And it worked out great!

Then, I tried the shirt on again and marked how much to take it in under the arms and along the side and also where to cut it off under the bust.

I stitched it up and cut off the excess on the sides and put a couple of tucks under the bust. (Oh, and did you know you can use a fork to make your tucks so that they're always the same? You can see the tutorial here. Genius!)

Then I took in the bottom of the shirt at an angle (the piece that I had cut off from under the bust) so that it fit to the bust line and got wider as it went down to the hips. This didn't take long at all and here's the finished project.


It was still a little loose when I got it finished (it made the bust line poofy) so I added a band from the side seams across the back to pull it in a little.

For that I used a piece of the strip of fabric I had cut off the front that had the button holes in it. To make it look finished I stitched some buttons on also, but they're really only there for looks. :0)


I was really please with how it turned out. Especially since I didn't have a pattern. Just an idea in my head sparked by that Pinterest find.


Friday, July 19, 2013

Banana chocolate hazelnut muffins

So I decided to play around a little with some muffins. I had seen a recipe for muffins using Nutella but of course I couldn't find it again when I was looking. That meant I was left to my own devices so I made something up. lol Oh, and I didn't have any Nutella......my son prefers the Jiff version of chocolate hazelnut spread.

This is the end product....


I decided to make a banana version.

I got my basic banana muffin recipe made. (You can find the recipe at the bottom of the post.) Also, I used agave nectar instead of sugar to keep more moisture in the muffins. I find that when I make banana muffins they tend to be drier than I want so I use the agave instead. Of course, I could always just add a little more milk.....that would work. If you don't want to use the agave, of course you can use regular sugar. It's the same amount, and you might want to add in a splash of milk so that the batter isn't quite so thick.

So, back to the making stuff.

After I got my recipe all made, I just dumped some of the chocolate hazelnut spread into my bowl. It looked like this..........


I just folded it in so that my batter (and later my muffins) would have swirls of the hazelnut spread.


Then I put the batter in the muffin pan, put it in the oven and waited 20 minutes.


And that's it. Yummy muffins for breakfast!


Here's the recipe.


Banana Chocolate Hazelnut Muffins

1 ¾ cups all-purpose flour

2 tsp baking powder

¼ tsp salt

1 egg beaten

1/3 cup agave nectar

½ cup milk

¼ cup oil

½ cup mashed banana

½ cup chocolate hazelnut spread


Preheat oven to 350F.


Grease 12 muffin cups or use paper muffin cup liners. Mix the flour, baking powder, and salt in a large bowl and set aside. In a medium sized bowl, combine beaten egg, agave nectar, milk, oil, and mashed banana. Add to the flour mixture and combine well, but do not over stir. Gently fold in the chocolate hazelnut spread leaving a swirl effect to the batter. (To be perfectly honest here, I did not measure the chocolate hazelnut spread. I just glopped a bunch out into my bowl until I thought it looked like enough.)


Fill the muffin cups 2/3 full and bake for 20 minutes or until set.


Let me know if you try them and what you think!

Wednesday, July 10, 2013

Ugly Christmas Sweater Gift

A few years ago I bout a Christmas sweater at Goodwill for the sole purpose of making a pillow with it. Well, since then my mother-in-law has been trying to sneak it out of the house and take it home with her. I've been looking like crazy to find another one but since people started having ugly Christmas sweater parties it's almost impossible to find one. But, that's because I was always looking when it was close to Christmas. I finally found one but it was in early June.

So, I took this sweater....


And made this pillow.....


She's going to be so happy when I give it to her.

It's really just a pillow cover because I left all of the buttons in tact and operational so she can just unbutton the sweater and take the pillow out if she needs to. It's also very quick and easy to make. I didn't have to take in the sides of the sweater at all so all I did was cut it off at the top, turn it inside out and stitch the top and bottom closed. I turned it back to right side out, inserted the pillow, and buttoned it back up. Piece of cake!!

Friday, July 5, 2013

Fourth of July Shirts

The girls made shirts for the Fourth of July. These were really easy to do, too.


We started with a plain white t-shirt and added a hand print in blue.


Next came some red stripes.


And that's it!! Then we just let them dry.


Easy stuff and it makes a really cute shirt.

Wednesday, July 3, 2013

I'm back......

Sorry for the long absence. We've been out of town on vacation for the last couple of weeks. We took a driving vacation from our home in Texas up to Pennsylvania and back. We did so many things along the way and had a great time.

It just so happened that Father's Day fell during our trip so the kids and I made Dax's present before we left and gave it to him on Father's Day.


The kids cut out the signs to hold up and I took the picture. I had the picture printed as an 8 X 10 and put it in a nice frame for him.

It was funny when we were trying to take the picture because I only had a few minutes in which to take it and it was cloudy, so we kept running around looking for the sunniest spots as the clouds moved.

I was happy with the picture and I think Dax liked it too.

I have more to show so I won't be absent as long this time. Hope you're having a great day.

Friday, June 7, 2013

I can fix that!

So, some time back I bought this shirt online and once it arrived it was too tight in the bodice so I gave it to my daughters. They decided that they like the shirt, but not the long sleeves.


Somewhere around the same time I also bought these pants on ebay. When they arrived I found that the flare in the legs was pretty major.....like I couldn't see my feet at all.


So, I was trying to decide how to take in the flare on the jeans because the seams on the inside of the leg and the outside are finished off and anything I did would be noticeable.

Then one day an idea struck me and I decided how to make things work out so that we would all be happy. I did the only logical thing. I cut the sleeves off on the shirt and the flares off on the pants. Woohoo!


I hemmed the sleeves on the shirt. Done! And the girls are happy with it.


I just have to add here that every time I use my sewing machine my husband gets a whole new set of brownie points for buying it for me!!

Just look at the beautiful job it did when I hemmed the sleeves on this sheer fabric!!


I took the lace that was in the middle of the sleeve and down at the cuff and separated it from the fabric. Then I stitched it together in one long strip.


I turned up the raw edge on the jeans (with right sides touching) and stitched the lace around the bottom and again around the top of the lace.


Ta-dah!! New capris.

And they're cute too!!


So now we're all happy.

I love it when I can take the things I am unhappy with and turn them into things that I AM happy with.

Monday, June 3, 2013

A New Look

Every year my parents give us one of those big tins of popcorn. And every year the kids devour it and I throw the tin away. Well, this year I decided to try to make something useful from it.

It started like this:


I roughed it up with some steel wool. (Not the mafia kind of roughed up, just a little scratching the finish. HA!)

Then I coated it with a thin layer of mod podge and applied a couple of sheets of scrap booking paper. Of course it needed two sheets plus about 1-1/2 inch of a third sheet of paper. One of my daughters was quick to point out that I didn't match the seams.

I sent her to her room.

Not really, but I did tell her not to inspect my work so closely.


Here's the finished product. Well, maybe finished. I have paper to do the lid but haven't done it yet. I can't decide if I should or not. I mean, the red actually matches.


So, I did this with no idea of what I was going to use it for. But this morning I think I actually decided to use it to hold the wild bird food. Right now it's just in the bag sitting on my pantry floor and won't this look so much better than that?

If I keep making things that are cute to hold the stuff in my pantry I'm going to have to take the door off and force people to go look at it when they come to my house.

Sunday, May 26, 2013

More cooking.....


This time I made these quick and easy pizza rolls as one of our snacks for family movie night.


Pizza Rolls:

1 pkg. canned biscuits
1 small jar/can spaghetti sauce
cheese cubes
pepperoni (or other pizza topping favorites)


Preheat oven to 350F.

Flatten each biscuit dough piece. (I just did this with my hands as I was preparing each roll.)

Place a spoonful of sauce, cube of cheese, and a slice of pepperoni (or your chosen toppings) in the center of each flattened biscuit dough piece. Fold the dough around the toppings and seal.

Place on cookie sheet about an inch or so apart.

Bake for 12 - 15 minutes, or until golden brown.

They are good just like this. This is the second time I've made these and this time when they came out of the oven, I rubbed butter on the top and sprinkled them with a little garlic salt. I think it would also be good with parmesan cheese sprinkled on top. I'm going to try that the next time around.


On a side note:  I usually take my pictures when my kids aren't around. In a house with four teenagers there's always someone around to 'help' me if they're here (or awake).  When I was trying to take these pictures one of my daughters, Abigail, kept photo bombing them.

 
She's using a zoo pals plate.


Yes. I only have teenage children and I'm still having to buy zoo pals. LOL

Thursday, May 16, 2013

Cream Cheese Cake Mix Cookies

I saw this recipe on facebook, so I don't know where it came from and this is all just from memory.


Anyway, I made these cookies with white chocolate M&Ms in them. They taste really good, and they stay soft and chewy.


(Obviously photographing food is not one of my strong points.)


Cream Cheese Cake Mix Cookies

8 oz. package cream cheese - softened
1/4 cup butter - softened
1 egg
1 box yellow (or white) cake mix
add-ins of choice

Cream together butter and cream cheese until smooth.

Add in egg and continue to mix until fully incorporated.

Slowly stir in cake mix. The dough will get thick.

Add in your treat of choice. (I used white chocolate M&Ms but would be good with all kinds of things.....chocolate chips, toffee chips, chopped peanut butter cups or snickers bars, etc.)

Bake at 375 F for 10 minutes.


Like I said, the cookies are really good. But, a word of warning......

I make a batch of cookie dough, but then only make 8 cookies to put into my children's lunch each day. I made this dough in the morning so the first batch of cookies was a breeze. Then I put the leftover dough into a container and put it in the fridge. Well, the next morning when I made the cookies the dough was a sticky mess. The cookies still tasted great, but once you chill this dough it's VERY sticky and hard to work with. But, the silver lining here is that it really sticks to the spoon so once I get the dough on the cookie sheet there's still a big glob left stuck to the spoon and what choice do I really have but to eat it? So maybe it's not so bad that it's sticky after all..............

Monday, May 13, 2013

I need to craft....

We have been so darn busy that there is no time left to craft. OR, if there is time there is certainly no energy.

And for all of you crafty folks out there, you know we need an outlet or we start to go a little stir crazy.

Just look what not having an outlet has caused me to do!!!

I took it out on the dog!!!


It's my daughter's dog and my daughter was less than amused.


But, honestly, the rest of us couldn't quit laughing and it managed to stay on for about a week before it wore off.


If you want to try it yourself I just used an eye liner pencil.

I'm sure I wouldn't have done it at all if my daughter hadn't told my that I 'couldn't' do it. HA!

Monday, April 29, 2013

Mmmmm.........muffins........

We have a client that is an older lady and she likes to shell pecans when they're in season. So at Christmas time she told her kids that she wanted pecans to shell. Well, they came through with about 300 pounds of pecans for her. Then, she also knows another man that owns and orchard and dropped by out of the blue one day and brought her another 300 pounds!! So, she's been giving pecans to everyone that she can.

I just happened to stop by to pick up her paperwork in the midst of all of this and was the happy recipient of a couple of bags of shelled pecans. And they're really good too.

So, I've been making goodies with pecans in them. We don't generally like pecans in our breads or cookies so I've been looking for things that revolve around the pecans. I came across this recipe for Pecan Pie Muffins at The Girl Who Ate Everything.


They were really good!! To be honest, I don't really care much for pecan pie (I know! I know! My mother wonders how I can be both a southern girl and her daughter.) but I really liked these. They're gooey and decadent and just all around good.

Sunday, April 21, 2013

My how time flies!

Wow! It seems that another bunch of time has passed since I was on here last. I haven't really had time to work anything new. I've got a couple of recipes that I'll share soon but that's been about the whole of it.

It was a crazy busy tax season at the office and with quarterly reports now due it hasn't really slowed down much.

We've also been busy dealing with the crappy stuff that life sometimes throws at us all.

Two weeks ago one of our dogs was poisoned with anti-freeze. What a horrible thing to do to an animal. It's an awful way to die. And the daughter that this dog belonged to was very attached and involved with her dog and she loved him so very much. It's been heartbreaking to see her go through the hurt of his death and how awful it was.

Not long before this happened, she painted this picture of him:


Not bad for a 14 year old girl that's taking art at school for the first time this year......if I do say so myself. lol

She is coping with it by drawing and painting and I'm glad she has that outlet.

Another daughter was in a pageant yesterday and when we got home I found that our refrigerator isn't cooling. *sigh* I am completely grateful that we have another refrigerator in the garage that doesn't usually have much in it so that I at least had somewhere to put the food until we can get a repair man out to the house.

But somewhere in the meantime, I'll try to get back to doing things that I like.....

Friday, March 29, 2013

Look at me.....farming......

Wow! I had no idea!!!

I saw (of course on Pinterest) that you can put the end of romaine lettuce in water and it will regrow. So of course I tried it.


And it works!!!


I've currently got two going.


As you can see, it grows pretty fast. I'm going to plant the bigger one in dirt pretty soon. I figure to actually keep it going we'll have to do this several more times so that there are always different stages of them. I'm going to try to keep them all in a big pot in the house so that all the wild critters don't get into them.

So far I'm thinking this is pretty neat. What do you think? Does this count as recycling?


Tuesday, March 19, 2013

What a great pot holder!

Last month at sewing club during show and tell, one of the other ladies there had a pot holder that was pure genius. I heard her tell someone else that she used a pattern that she had bought somewhere else. So, the next day I got online and found it at Whistlepig Creek Productions. You can purchase either a print version to be mailed to you or you can download a pdf file.

Anyway, I think these are genius. And the reason is because these pot holders are made in bowl form to be used in the microwave. You put the bowl in the potholder, THEN you put it in the microwave. That way, when you take it out you don't have to life something hot to get it onto your hot pad. Genius, right?!

 I'm going to be making many of them.

This is my first attempt:


It didn't turn out quite as bowl shaped as I wanted it, but that is totally my fault. I cut the places where the darts go (which is what makes it curl up into the bowl shape) and then trimmed my pieces. After that I didn't go back and re-cut my darts so they're smaller than they're supposed to be.
 
Oh well, it still works. I've already used it several times. I'm going to make more as soon as I have some time to sit and sew for me. I'm pretty sure these will be gifts for quite a few people this year.

Wednesday, March 13, 2013

Easter Wreath

I saw a picture on pinterest of a cute Easter Bunny wreath so decided I needed to make one.

Here's my finished wreath....


Here's how I made mine:

I started with a pool noodle. (Note: this is one that I picked up off the side of the road to use for something else last year and then changed my mind.)


I cut about 10 inches of it off  so that I could make a smaller circle with it. I used duct tape to hold my circle together.
 
 
Then I wrapped my boas around until it was covered. Because I used a green noodle it took me 5 boas to cover it and probably could have used another but I didn't want to wait to finish it until I made it back to the store. :0)


I used the ears from an Easter headband.


I cut them off of the head band and glued them onto my wreath. The boas have little loops at each end of them and I left one of them loose to hang the wreath with.

So here's the finished wreath.


So.....I still think it's cute, but I made my circle a little too big because I think it looks kind of like a cat. HA! And Dax says he's not sure which end of the bunny he's looking at here. (He's a sick, sick man. lol)

Anyway, today I clicked through on Pinterest and read the original post on how to she made hers -- because who would want to read the instructions first? -- and hers is a lot easier than what I did. Go figure! You can check out Mrs. B's Hive's post here, and trust me, her directions are a lot easier.