Tuesday, December 28, 2010

Cookies, cookies, and more cookies

Each year I make a box of cookies for some of our monthly bookkeeping clients.

Let me tell you, it's a major undertaking.

I spend about two weeks making test cookies for the family to taste until I settle on the 6 or 7 diffent kinds that will will be in the boxes.

I usually make about a dozen of each kind and do this for about 10-15 different clients.


I know, right?

Here are the cookies I chose this year.


From left to right: Chocolate Mint Chip Cookies, S'mores Cookies, Melting Moments cookies


Chocolate Raspberry Bars, Snow Balls, Cinnamon Cookies

It's always a lot of fun trying all the new cookies in order to make a decision, but, honestly, I'm sick of cookies for awhile.

Monday, December 27, 2010

Christmas Stocking

I'm so excited!!!

I started a Christmas stocking for my daughter Kirsten this year.


And, I actually finished it THIS YEAR!


AND, in time for Christmas!!

(if you can believe that)

It is a redwork pattern that I ordered from Bird Brain Designs earlier in the year. She's got some really cute stuff. Go check it out.


I finished the back of the stocking with leftover fabric from the sleeve of the Santa Claus sweater that I made into a pillow. (I had to really keep my eye on that pillow on Christmas day because my mother-in-law kept trying to sneak out of the house with it. lol)

Sunday, December 19, 2010

To market, to market......

With all of the felt food that I've made for my niece I figured she should have something to carry it in, so I made a market bag for her also.


I just used fabric that I had on hand and made up the design as I went.


I used burlap for the outside. But, since that's kind of itchy, I lined the inside and added some little handles.


This whole project was just so much fun. I've never worked with felt before and I didn't have patterns for any of the things I did. It is so far off from my norm for me to do things without a pattern and directions. It was really freeing. And honestly, trying something with no pattern and having it turn out the way I envisioned really gave me a boost of confidence to keep going. It really has helped me to even begin to think about branching out more on my own and looking at things in a whole new way. Give it a try yourself!!

Friday, December 17, 2010

Felt Food Installment.....

Well, this is the last installment for the felt food project for my niece's  Christmas present.


I made a bunch of little tea bags.


I used wedding tulle for the actual tea bags and put sequince leaves inside.


It's really been a lot of fun doing this. I suppose that the possibilities are unlimited. All kinds of foods could be made.

There are some that I attempted which were total fails. I'll need to practice up on those a little more. :0)

Monday, December 6, 2010

Oh my!

Oh my!!! How time does fly when we're busy.


I can't believe how long it's been since I've posted or that I left the picture of my ugly pantry up for so long. What was I thinking?!


Actually, this is the busiest time of the year for us. My babies turned twelve last month. I still can't believe it!! I am a little more than scared at the prospect of teenagers next year.


I have been busy on a big project so you'll have to wait a little longer to see pictures of it. It was a huge undertaking and a totally new undertaking. But, more on that later. (Call me a tease, it won't bother me.)


I did stop into my studio for a few minutes on Saturday and whipped up this Christmas pillow.


I made it from a sweater I bought at Goodwill last year. I think I paid $1.00 for it.

I stitched it up so that I could still unzip the zipper to take the pillow form out to use for a different season. That also helps to save so much room on storage space.

I was absolutely thrilled with how it turned out. And, seriously, it only took a few minutes to make. Just some zig-zag stitching and then cuttin off the excess and I was done.

Now you know to be on the look out for those holiday sweaters. There are bound to be tons of cute things to be made from them.


Tuesday, November 16, 2010

Pantry Re-hab

OK. One of the things on my list of things I wanted to get done was to re-organize my pantry.


I'm really going out on a limb here, because I'm going to show you how bad it actually had gotten.


*deep breath*


It had just about everything crammed in there. There were tons of craft supplies included. And, if that wasn't enough, anytime the kids drop something, they just push it out of the way. Actually picking it up is out of the question. lol


Well, I had started going through things and cleaning it out and then I had to push it up to full gear. I have a neighbor that has goats. She's not feeding them. I would call animal control except that she would know it was me that called -- there aren't any other neighbors. We've had our issues with her before and I don't want to make it any worse. I plan to live here for quite awhile.

Anyway, rather than watch her goats starve, I bought feed and on of my daughters has been feeding them. She carried the bag of feed into the house and left it in the pantry. Bad idea.......it was full of weevils!!!

So, needless to say I had to empty and clean the pantry, then discard all of the grain products in my pantry. (I just got rid of them rather than checking to see if they had weevils--it can take a month after they've been infested to actually see any signs.)

I am still in the process of transferring things to glass jars to avoid any problems in the future, but the pantry is looking much better.


I'm always amazed at how much stuff is around my house that just doesn't need to be. Why don't we get rid of it sooner? Why is it always when it gets overwhelming that I finally decide to sort through it and discard the things that will never be used? It would be so much easier to just get rid of it as we go.

I guess that's why. I forget that there's an easy way to do things sometimes. LOL

Monday, November 15, 2010

I'm still here.......

Oh my gosh!!!! I can't believe how much time has gone by since I've posted. I'm so sorry for the absence.


Right after my last post, Dax and I went to San Antonio for the weekend. Just the two of us. My parents came to keep the kids.


We had a great time, but I woke up early that Sunday morning sick as a dog. It took about the next week for me to even have the will to live again. lol (My mother thought it was just a hangover. Really? For a whole week? I don't think so Mom!)  It took me about two weeks to finally get over it, and then a couple of the kids got sick too.


As a result, there hasn't been a lot of crafting or creating going on.


But I did get a little bit done.


In the entry way I hung this banner that says 'Give Thanks'. I used stencil letters that I first painted orange and then covered with orange glitter. It was a messy job but a lot of fun.


I came across several yards of burlap at the thrift store and used that to back my letters. I used scrapbooking brads shaped like leaves to attach the letters to the burlap. Then I strung the letters onto jute.


Above my banner, I hung a branch (a small one) from the yard. I bought a couple of bags of fake leaves in the dollar section at Target. Each day we use these leaves to write something we're thankful for and then we stick them on the branch or the wall around it.


The picture is just the first day. It's looking much better now.  I was going to do a whole tree with brown craft paper, but our kitten wouldn't quit attacking it and trying to crawl under it, so I had to alter the plans a little. (Now I'm a little worried about what the Christmas tree will be like.)


Anyway, I really like doing this because it makes the kids think of all of the things in their life they have that are good and worth giving thanks for. It's a good exercise for all of us.

Wednesday, October 20, 2010

I know it's not Easter yet

but I just had to make this chocolate bunny.


It's just another installment in my new obsession with felt food.


I often freeze any extra (read: the ones I hid from the kids before they went into candy overload) chocolate candy at Easter. I can use it for cooking when I need chocolate during the year. Sometimes I even go buy a bunch after Easter when they're on sale for next to nothing and just put them in the freezer. But even then I have to hide them from the kids.

Anyway, that's why I happened to have this box.

I just traced the inside of the plastic bunny tray onto a piece of paper. I cut that out and used it as my pattern for the felt bunny.

A couple of colors cut into circles to make the eyes, stitch around the outside of the bunny, stuff it, and sew it closed.


It was so quick and easy to make.


I don't know if my niece will like all these felt foods for her play kitchen or not. But I do know that I've had a blast making them. My kids are all wanting felt foods of their own even though I would think they're too old to be interested.

I warn you......if you ever try making any, you won't be able to quit!!

Monday, October 18, 2010

Another block done

I finished the fourth block in Sharon's Annie block of the month.


I just can't wait to get all of these blocks made and sewn together. It's just going to be so cute!!!


I've already even got the next block traced and ready to start stitching. Yeah me! lol


On another note, my kids think I've lost my mind. They're pre-teens so what's new, right?


But, before I let them give clothes away I always go through the sacks. (I've got about 5 garbage bags full of clothes to go through right now.)


Anyway, I always check to make sure they're not giving away something that has fabric that I fell in love with when I bought the clothes in the first place. Some things I'm just not willing to part with that easily because I love the fabric and I know I can use it in some other way.  I also have to make sure that they aren't trying to donate things that are ruined and just need to be thrown away. I read an article not too long ago on how much charity thrift shops are forced to spend and waste services just to haul off the things that get donated that aren't fit to be sold.

But I also have to go through the clothes to make sure they're not trying to get rid of things like this:


This is a pair of socks that I bought for my girls. One of them decided to play outside in the socks with no shoes and put a big hole in the bottom of one. Well, she decided to get rid of them and I just about fainted when I found them about to disappear forever. Look at all of those buttons that she almost sent to be thrown away!!!! Gaah! LOL


That's the real reason they think I'm crazy. Because I grabbed the socks out of the bag and then sat and cut all of those buttons off. What a waste that would have been.

Wednesday, October 13, 2010

Goldfish

Another installment in the felt food gift.


This time I've made goldfish crackers.


I think they turned out great too......if I do say so myself. LOL


I think I'm gettin hooked on felt.


And honestly, I didn't need another craft obsession. My craft room runneth over as it is.

Monday, October 11, 2010

Annie block #3

I finished my 3rd block in the Annie BOM that Sharon is doing.


It's actually supposed to be the September block I guess. lol

I just love the way these are turning out.

I also got all of the stitching done for the October block. I just have to get the borders sewn on.

Thursday, October 7, 2010

A quick bracelet

I can't remember where in the world I saw an idea similar to this (one of the problems with just surfing the craft sites/blogs out there.) but, it's been on my mind a lot lately.


It was soooooo easy to make.


It's simply a seam from a pair of jeans, strung on memory wire.


My denim strips weren't quite long enough (they came fron the back above the pockets of a pair of my daughter's too small jeans) so I used two pieces. I put a square glass bead in between the two strips to make it look like they were in two pieces on purpose. Then I put a pink bead at each end and a clear glass bead where the wire is turned in.

That's it!!!

I swear it took longer to cut out the denim seams than anything else. While I was doing it I thought to myself how it was just one more piece of an old pair of jeans that wouldn't get thrown away. LOL

Try it......you'll love it!

Tuesday, October 5, 2010

More felt food.....pasta

In continuing with the felt food I'm making for my niece, I've made these cute little bow tie pastas.


They're so easy to make.


Just cut rectangles of cream colored felt with pinking shears. Then gather them in the middle and wrap your thread around.

Of course you'll want to remember to knot your thread at the beginning and the end. :0)

It's just that easy!!

Sunday, October 3, 2010

Halloween paper pumpkin

I recently made this from an old book. (okay, maybe it wasn't that old, but I read it and didn't really like it, so I did something else with it that I did like.)


The directions on how to do this are here. It's really easy to do.

The mouth didn't quite turn out how I like, but it'll do for now. I used a little bit of floral wire for the curly parts and some green fabric for the leaf.

It was quick, easy, and cute. What more could you ask for?

Friday, October 1, 2010

Cookie Options

I bake cookies for my kids' lunch every morning. I make the batch of dough and then only bake 8 cookies each morning.


I love the options that the cookies using cake mix give me.


If you haven't tried them, they're the easiest cookies in the world to make.

1 pkg. cake mix (flavor of choice)
1/2 c. vegetable oil
2 eggs

Mix together. Drop by teaspoonful onto ungreased cookie sheet. Bake at 350F for 9-10 minutes.


How much more simple can you get?


Anyway, this week I made a french vanilla cake mix into cookies.


These I sprinkled with International Foods coffee in the dark mayan chocolate flavor.


This week I've used this dough base and made cookies with white chocolate chips one day, caramel pieces the next, sprinkled with brown sugar and cinnamon the next day, and finally with peppermint chips. All of those from one box of cake mix!!

That's what I LOVE about these cookies. They're so versatile so you can make them over and over and not get bored with them.

Wednesday, September 29, 2010

Felt Popcorn Tutorial

Awhile back I posted this picture of the felt popcorn I had made and promised to post a tutorial.


So here it is, I guess. 

I've never done a tutorial so forgive me if it makes no sense. :0)

I am making a bunch of felt food for my neice for Christmas. I thought it would be great for her to play with in the little kitchen she got last year. I looked all over the internet and couldn't find a popcorn pattern that was quite what I wanted. So, of course, that left me with having to come up with something on my own.

I started with just a circle of white felt (actually I tried several different sized circles) but still didn't like the finished product when I got them all sewn up. I spent so much time cutting it into the shape I wanted (after I'd sewn my circle) that I decided I needed to start with a different shape altogether.

I cut several shapes out of paper and tried them and finally settled on this flower looking piece. To make it a little more sturdy, I cut it out of heavy plastic (it's the top off of a small plastic container that had scrapbooking ribbon in it--I like to use what I already have around the house if I can.)


Then, I used a yellow colored pencil to trace my pattern onto the white felt. I figured since I would be 'buttering' the popcorn later, yellow was my best bet.


 Then cut them out.


Using white thread I stitched one long stitch in each petal.


I rolled up a tiny ball of stuffing.


And placed that in the center of my piece of popcorn.


Then pull the thread tight so that it gathers up all of the petals.


You can adjust them around if you need to.

Then I wrapped the thread around the outside of my piece of popcorn while pulling it even tighter.  I wanted to make sure that the stuffing would stay put inside. The thread should wrap around above the stuffing but still at the base of the petals.


Next, I ran the needle up and through the center of my piece of popcorn so that I could knot it on the inside. That way the knot could be hidden.


After the piece of popcorn is all sewn, I hit the edges with a yellow marker. There is no right or wrong way to do this. I just wanted a little yellow here and there so that it would look buttered. I still wanted it to be mostly white. Be sure, though, that the marker is a non-toxic one. Don't want anyone getting sick if the popcorn makes to their mouth. Although, these pieces are really popcorn size so it would be wise to keep them away from little ones that don't know yet not to put things in their mouth.


And that's it! I love the way it turned out. It looks really authentic and you don't have to guess what it is. lol

One word of caution though........since this is working with white felt, wash your hands before you start working on these. Otherwise, your popcorn will be dingy and nobody likes dirty popcorn.

I'm linking up with Tea Rose Home's Wednesday linky party. Be sure to check out all the wonderful things you can find there.


Tuesday, September 21, 2010

Baking fail

Usually, I make bread for my kids' lunches (and to eat in general). They go through a loaf bought at the store much too quickly so I try to save a little $$ by making it myself.

I love  Craft Gossip and saw this post and decided to try making the panda bread myself. She used cocoa to color her bread but I didn't want the flavor so I just kneaded in some gel black food coloring. That part worked out fine. My fail was the overall outcome.


See?

He's only a panda if he's really messed up.

Poor little thing. lol

Sunday, September 19, 2010

And yet another shirt...........

I bought this shirt to go with something else, but it didn't work for that. I found another one that I liked better.


I found some bling (I don't know what else to call them because they're not really beads) on clearance at HL which I bought in several colors.

(I bought them just becaue they were on clearance and I was sure I could do something with them....we've all been there haven't we?)

Anyway, it took a few days for me to put the two purchases together in my head with an idea.

I used a fabric pen to mark my placement points. Then I hand stitched them into place.


I've already worn the finished product and I loved just the touch of flash that it gave to the shirt without being over powering.

Friday, September 17, 2010

Back to shirt refashioning

Ha! I guess I can't go too long without showing a shirt make-over.


I wonder if there is a twelve step program for this? lol


Anyway,


I had these two shirts that I didn't wear much. One was too short and one was too low cut.

(Pardon my helper in the picture. She doesn't quite understand 'move' when I say it.)

I've been seeing all these posts from other bloggers that put ruffles onto shirts to re-do their look. I'm not usually much for ruffles so when I tried it I didn't make them terribly full.


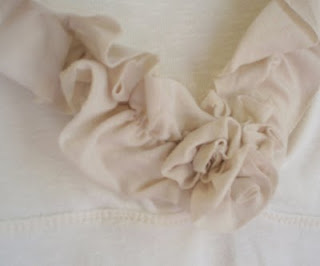
I gave it my best shot at making some little gathered roses at the bottom of the neckline to help make it even a little less revealing.


I still need to work on that technique a little, but at least I have a shirt I'll wear now.

And what's even better is that I only used the sleeves off of the shirt that was too short. That still leaves me with options on doing something else with it. woohoo!

Thursday, September 16, 2010

Today's the Day!!!

Believe it or not, the count down has started.


Today is 100 days til Christmas!


Hard to believe isn't it?


Visit 100 Days to Christmas to sign up for lots of help and support to get you through the holidays without losing your sanity.

Wednesday, September 15, 2010

Another block finished

I finished my second block for my Annie BOM over at Daisy Cottage Quilting.


I'm really loving these!!

Be sure to go check out Daisy Cottage Quilting. Sharon is killing me with all the cute things she has. I've just recently ordered a quilt kit from her too.

Now I just need to figure out when I'll have the time to get it all worked on. My list is growing much more quickly than I'm getting items checked off. But then, I'm certain I'm not the only crafter out there with this problme.

Tuesday, September 7, 2010

Not a refashion!

I know that I've mostly had shirts that I've refashioned lately, so I thought I would prove that I really can do something different. lol


I made these muffins the other morning.


They're donut muffins.


How can you go wrong with muffins that use donut dough?


The kids loved them.


I got the recipe at the Hillbilly Housewife site. She's got some really great recipes there. You should go check it out.


It's raining here today. I should be at home, snuggled on the couch, working on something fun. I say snuggled because I'm always cold when it's raining. It really doesn't matter that it's probably in the 80's outside, I'm still cold. I wore jeans today with a 3/4 sleeve length sweater. That makes me a little closer to crazy doesn't it?

Wednesday, September 1, 2010

It's a refashion, but not mine this time.....

Abigail has been bugging me to get her a sewing machine. (Really that's just one of the things she's been bugging me about.)


Anyway, I told her that first she should learn to sew by hand because there are some things that can't be done on a sewing machine. And, if she learns the mechanics of how things work and/or go together it will only help when she is creating things on the sewing machine.


She has a bag of clothes in her room that she doesn't wear anymore so I told her to use those things to work with on creating something new.


Here's what she came up with.


The red was a shirt that she cut up and turned into a jacket. She took the bottom of the red shirt and used  to make the flowers and used the buttons from the red shirt for the center of the flowers.


She did a great job, didn't she?


I'm linking this bit of bragging to Tea Rose Home's Wednesday link party. Go check out all the other great things she and so many others have to share!


Tuesday, August 31, 2010

Yes, it's another shirt refashion....

My girls got a couple of bags of hand-me-down clothes a few months ago. There were many things that they liked that will be well used. The things that they didn't care much for have been passed on for others to use.


One of the shirts that Abigail liked, though, had a stain on the front and another on the back. She was really disappointed so I told her that I would see what I could do to fix it.


This is what I came up with.


I had a dress that I had kept from when they were little because I just loved the little blue flower print.

Anyway, I used the bottom of the dress to make a ruffle on the bottom of the shirt. Then I cut out flowers (it only took one to cover the stain) and stitched those on. There's a single flower on the back of the shirt covering the stain there.

It still didn't feel 'done' so I dug through my stash and found the blue buttons for the flower centers. Originally I had picked out all matching buttons, but I decided I liked the idea of each one being different instead.


Then, to finish it off, I cut the ties off of the dress, opened the side seams in the shirt, and added the ties.

Abigail was really happy with the makeover and I am too.